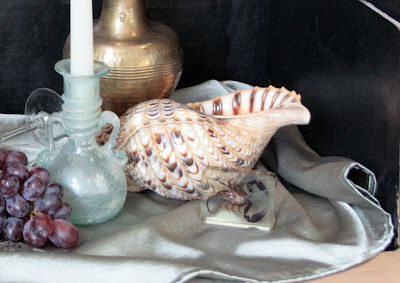
Here is a part of that still life I set up. This is what I will develop into a painting.
My brief is to build up the layers with a succession of thin glazes, in the manner of the Dutch masters, so the work has harmony and depth.
I will choose the 'earth' colours for my pallette so as to emulate the dullish, even, characteristic tones of the classical still life.
First I do a series of drawings to familiarise myself with my subject. Deciding to leave out the grapes, in order to make the composition more tidy, I do:
1. blind drawings, only looking at the subject and not the paper. These look funny when they are finished but they are excellent for making me really see what I have in front of me. Blind drawings hone my 'artist's eye'.
2. contour, or outline drawings, so I see the big shapes.
3. negative shape drawing. This is the space between and around objects. These shapes should be interesting and relatively balanced. This is an important part of the composition.
4. Tonal drawings, that help me to focus upon the lightest lights, and the darkest darks.
 5. Choosing a light colour wash that will enrich my final work, I paint over my canvas. This is called a tonal ground. The colour chosen is based on experience and has the effect of setting an atmosphere. Cool colours mute and warm colours tend to make the painting look more lively. I have chosen the warm raw sienna.
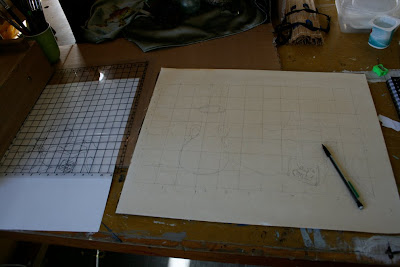
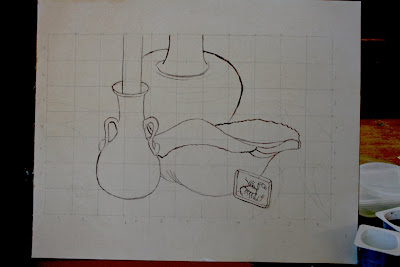
6. Using one of my line drawings, or 'cartoons', I transfer it to my canvas. I use a square grid to enlarge it accurately. So that my line drawing is able to be consulted later, I overlay it with a grid that I ruled up with felt-pen on a piece of acetate. A heated piece of laminating film is ideal for this. I just use a pencil at this point.
 7. Using a thin long soft watercolour brush, I go over the outline again. I use thinned raw umber. When completely dry I rub out the pencil grid.
 8. Consulting my tonal drawings and the subject in front of me, and using a thinned wash of burnt sienna, raw umber and prussian blue mixed, I block in the darks. I don't worry too much that this layer doesn't look very even. It will be built up in successive layers and the patchy look will disappear.
 7. Using a thin long soft watercolour brush, I go over the outline again. I use thinned raw umber. When completely dry I rub out the pencil grid.
 8. Consulting my tonal drawings and the subject in front of me, and using a thinned wash of burnt sienna, raw umber and prussian blue mixed, I block in the darks. I don't worry too much that this layer doesn't look very even. It will be built up in successive layers and the patchy look will disappear.
Next: Part 2.


I'm enjoying this step by step "how to". Thanks for sharing.
ReplyDeleteYou do provide us with fascinating posts. I am really enjoying these 'lessons' because it is helping me appreciate what have on my walls and what I see in the galleries I frequent. As Mum painted and CJ still paints I'm beginning to appreciate their talents even more.
ReplyDeleteI'm looking forward to Part 2.
Can't wait for Part 2 and ultimately the finished piece. Happy painting!
ReplyDeleteWelcome to TLVD Kate i. Thanks for dropping in!
ReplyDeleteGB and YP, I am still working on the rest so will snap and post when I get to the next bit. Which might be the end.